
CellShield Help
Documentation for IRI's Excel Add-In for Data Masking
IRI CellShield Help
If you do not yet have CellShield® installed, or need IRI support for CellShield, click here.
To use CellShield to protect data in your Excel® spreadsheet, click the CellShield tab to open the ribbon bar, which includes the following Data Protection buttons:

Mask/Redact - replaces selected data with a specified masking character.
Encrypt & Decrypt - encrypts/decrypts selected data with the function you select.
Pseudonymize & Restore - Pseudonymizes by scrambling the selected data, replacing it with a set of like values or sequence of numbers. Restores the data when selected.
Mask Redact
1. Select the data to be masked, including columns, rows, or both.
2. Click the Mask Redact button. The Data Mask/Redact window opens.
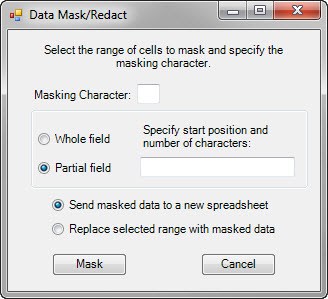
3. In the Masking Character field, enter the character to be used as the mask. This can be any letter, number or character except a backslash ().
4. Select whether to mask the Whole field or Partial field.
5. If you plan to mask a partial field, enter the number of the start position, followed by a comma, followed by the number of characters to mask (e.g., 1,4). If you enter only one number, that number will be used as the starting position and the rest of the cell will be masked.
6. Select either Send the masked data to a new spreadsheet or Replace selected range with masked data.
7. Click Mask.
Encrypt
1. Select the data to be encrypted, including columns, rows, or both.
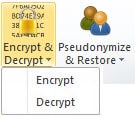
2. Click the Encrypt & Decrypt button, and then select Encrypt.
The Data Encryption window opens:
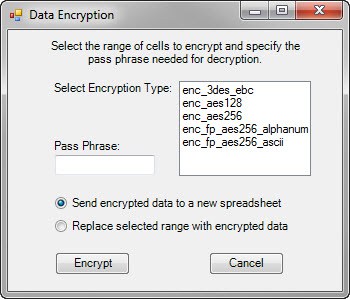
3. In the Select Encryption Type list, select the type of encryption you want to perform. Note that when you decrypt the data, you must use the same type used for encryption. The choices are:
|
enc_3des_ebc |
Use Triple DES encryption when there is no requirement to preserve original field widths or original field formatting. |
|
enc_aes128 |
Use Standard encryption when there is no requirement to preserve original field widths or any original field formatting. |
|
enc_aes256 |
Use Standard encryption when there is no requirement to preserve original field widths or any original field formatting. |
|
enc_fp_aes256_alphanum |
Preserves both numeric and alphabetic characters (including upper- and lower-case letters) when encrypting fields, as well as their original field widths. Other characters, such as - or *, are left unaltered so that field formats such as those found in social security numbers and phone numbers are retained. |
|
enc_fp_aes256_ascii |
Preserves original field widths when encrypting ASCII fields. This is useful when you do not want to preserve custom format characteristics of a field, but need to retain original field widths. |
4. In the Pass Phrase field, enter the characters to be used as the passphrase. This will be used for any subsequent decryption. Note that if you leave the Pass Phrase field blank, an internal passphrase key will be used. When decrypting, again leave the field blank.
5. Select either Send encrypted data to a new spreadsheet or Replace selected range with the encrypted data.
6. Click Encrypt.
Decrypt
1. Select the encrypted data that you plan to decrypt.
2. Click the Encrypt & Decrypt button, and then select Decrypt. The Data Decryption window opens:

3. In the Select Decryption Type field, select the decryption type that corresponds to the encryption method used.
4. In the Pass Phrase field, enter the passphrase you used for the encryption. If no passphrase was used during encryption, leave the field blank.
5. Select either Send decrypted data to a new spreadsheet or Replace selected range with decrypted data. Note that if you encrypted the data on the original spreadsheet, and then decrypt it to new spreadsheet, the encrypted data will remain in the original spreadsheet.
6. Click Decrypt.
Pseudonymize
If you plan to use foreign data to replace data in the process of pseudonymization, you must use a separate single-column file for look-up replacement values. The file must include at least as many unique values as there are unique values in the cells to be processed.
- Select the data within a single column to be encrypted.
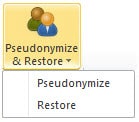
- Click the Pseudonymize & Restore button, and then select Pseudonymize.
The Pseudonymization Menu window opens:
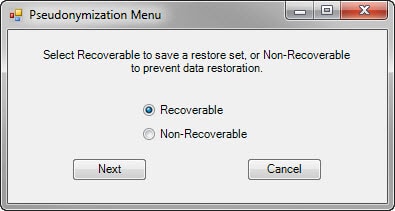
3. Select whether your data will be Recoverable or Non-Recoverable. If you select Recoverable, a file with the original data is created to be used to restore the data.
4. Click Next.
Recoverable
1. If you select Recoverable, the Recoverable Pseudonymization window opens:
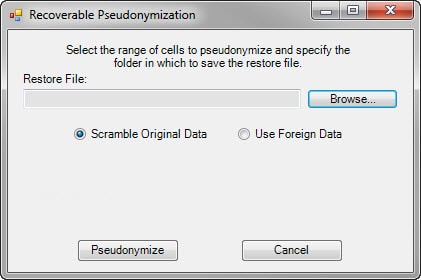
2. Click Browse to browse for a location and provide a name for the restore file.
3. Select Scramble Original Data if you are not using a file with replacement values, and then click Pseudonymize. The data you selected is scrambled and sent to a new spreadsheet named PseudonymData.
4. Select Use Foreign Data if you are using values from a different file. An additional field opens.

5. Click Browse to browse for and select the file of replacement values to be used.
6. Click Pseudonymize. The data you selected is replaced with the values from the file you indicated and is then sent to a new spreadsheet name PseudonymData.
Non-Recoverable
1. If you select Non-Recoverable, the Non-Recoverable Pseudonymization window opens:
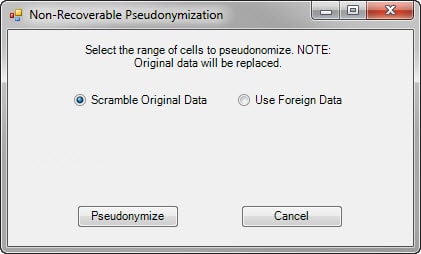
2. Select Scramble Original Data if you are not using a file with replacement values, and then click Pseudonymize. The data you selected is scrambled and replaced in the spreadsheet.
3. Select Use Foreign Data if you are using values from a different file. An additional field opens.
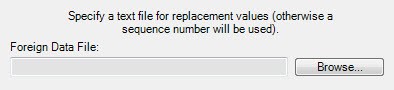
4. Click Browse to browse for and select the file of replacement values to be used.
5. Click Pseudonymize. The data you selected is replaced in the spreadsheet with the values from the set file.
Restore
1. Select the pseudonymized data that you want to restore.
2. Click the Pseudonymize & Restore button, and then select Restore. The Restore window opens:
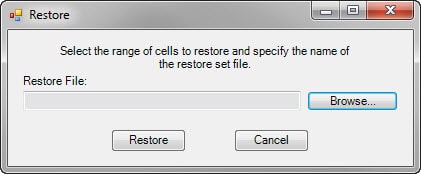
3. Click Browse to browse to and select the recovery file that was created when you pseudonymized the data.
4. Click Restore. The original data is restored in the spreadsheet.